





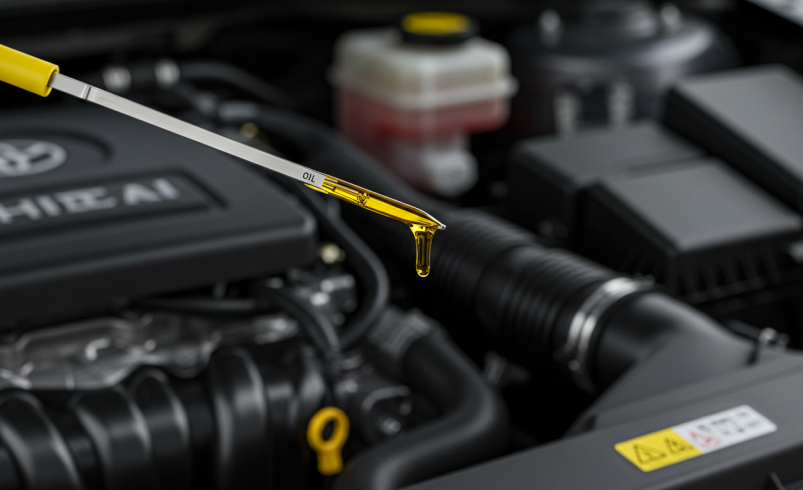

Engine oil is the lifeblood of your vehicle, lubricating moving parts, cooling the engine, and preventing wear. Understanding its condition and level is fundamental to maintaining your car’s health and longevity. Knowing how to check oil is a basic skill every car owner should master, as it can prevent costly repairs and ensure optimal performance. This guide will walk you through the essential steps for how to check car oil, covering everything from frequency to interpretation, empowering you to confidently monitor your engine’s vital fluid. We’ll detail the process for how to check engine oil accurately and what to do if adjustments are needed.
Why Regular Oil Checks Matter for Your Vehicle
Maintaining proper engine oil levels and condition is paramount for your vehicle’s operational integrity. Oil reduces friction between engine components, dissipates heat, and cleans internal parts by suspending contaminants. When oil levels are low, or the oil is degraded, its ability to perform these critical functions diminishes significantly. This can lead to increased friction, overheating, and accelerated wear on vital engine parts, potentially resulting in severe damage or even engine failure. Recognizing low engine oil signs, such as the oil pressure warning light on your dashboard, unusual engine noises, or a burning smell, is crucial. Ignoring these low oil symptoms can lead to expensive repairs. Regular checks help you identify these signs of low engine oil before they escalate into major problems.
When and How Often to Check Engine Oil
For most vehicles, a good rule of thumb is to check your engine oil at least once a month or before a long road trip. However, the ideal frequency for when to check engine oil can vary. Factors such as your vehicle’s age, mileage, and driving conditions play a role. Older cars or those with higher mileage might consume oil more quickly, necessitating more frequent checks. Similarly, frequent short trips, heavy towing, or driving in extreme temperatures can put more stress on the oil, requiring you to consider how often check car oil more regularly. Consult your vehicle’s owner’s manual for specific recommendations on how often to check oil. Establishing a consistent car oil check frequency is key to proactive maintenance. Generally, checking every few weeks is a safe practice for how often to check car oil.
Checking Oil: Hot or Cold Engine?
The question of checking oil hot or cold engine is common. For the most accurate reading, it’s generally recommended to check the oil when the engine is cold, or at least has been off for 10-15 minutes. This allows all the oil to drain back into the oil pan. If you check immediately after driving, some oil will still be circulating in the engine, leading to an artificially low reading. Therefore, for precise results, perform checking oil hot or cold with the engine cool. If you must check after driving, wait at least 15 minutes for the oil to settle. This practice ensures a reliable checking oil level cold vs hot assessment.
Step-by-Step: How to Check Car Oil Accurately
Performing an accurate oil check is a straightforward process. Follow these steps to check car oil to ensure you get a reliable reading.
- Park on Level Ground: Ensure your car is parked on a flat, level surface. This prevents inaccurate readings due to oil pooling on one side of the pan.
- Turn Off the Engine: If the engine has been running, turn it off and wait at least 10-15 minutes for the oil to drain back into the pan.
- Open the Hood: Locate and open your car’s hood.
- Locate the Dipstick: Proceed to the next step for guidance on this.
- Clean the Dipstick: Pull the dipstick out completely and wipe it clean with a rag or paper towel.
- Reinsert the Dipstick: Push the dipstick all the way back into its tube until it’s fully seated.
- Withdraw and Read: Pull the dipstick out again and observe the oil level.
These car oil check steps are essential for an accurate assessment of your engine’s oil. Following these engine oil level check steps will give you a clear picture of your oil status.
Locating the Engine Oil Dipstick
The engine oil dipstick is typically easy to find. It usually has a brightly colored handle (often yellow, orange, or white) and is located on one side of the engine block. If you’re unsure where is the dipstick, consult your car’s owner’s manual, which will provide a diagram. Knowing where is the oil dipstick is the first physical step in your oil check routine.
Reading the Oil Dipstick Correctly
Once you’ve pulled the dipstick out for the second time, observe the oil level. The dipstick will have two marks, often indicated by holes, notches, or the letters ‘L’ (Low) and ‘F’ (Full), or ‘Min’ and ‘Max’. The oil level should fall between these two marks. If the oil is below the ‘L’ or ‘Min’ mark, your engine oil is low and needs to be topped up. This is how to read oil dipstick markings effectively. The goal is for the oil to be near the ‘F’ or ‘Max’ mark, but not above it. This is what should oil level be for optimal engine health. An accurate engine oil dipstick reading is crucial for proper maintenance. Learning how to read car oil dipstick markings ensures you understand your engine’s needs.
Interpreting Oil Color and Consistency
Beyond the level, the oil’s appearance can tell you a lot about your engine’s health. New engine oil is typically amber or golden in color and transparent. As it circulates, it picks up contaminants and darkens, which is normal. Dark brown or black oil is usually fine, as long as it’s not sludgy. However, if the oil appears milky or foamy, it could indicate coolant contamination, possibly from a blown head gasket. A metallic sheen or visible particles suggest internal engine wear. Knowing what color should engine oil be when new helps you gauge its condition over time.
What to Do If Your Car Oil is Low
If you discover your car oil is low, it’s important to address it promptly. Driving with insufficient oil can cause significant engine damage. The immediate action is to add oil to bring the level back to the safe range. Do not ignore low oil symptoms or a low dipstick reading. Ignoring what to do if car oil is low can lead to serious mechanical issues.
Adding Engine Oil to Your Car
To add oil, first, ensure you have the correct type and viscosity recommended by your car manufacturer (found in your owner’s manual). Locate the oil filler cap on your engine, usually marked with an oil can symbol. Unscrew the cap, place a funnel into the opening, and slowly pour in about half a quart of oil. Wait a few minutes for the oil to settle, then recheck the dipstick. Repeat this process, adding small amounts and rechecking, until the oil level is between the ‘Min’ and ‘Max’ marks. Avoid overfilling, as too much oil can also cause engine problems. This is how to add engine oil safely and effectively. Proper adding oil to car engine technique prevents both under- and overfilling.
Frequently Asked Questions About Checking Engine Oil
- How often to check car oil? It’s recommended to check your car’s oil at least once a month or before long trips.
- Should I check oil hot or cold engine? For the most accurate reading, check the oil when the engine is cold or has been off for at least 10-15 minutes.
- What color should engine oil be? New oil is typically amber or golden. It will darken with use, which is normal, but milky or foamy oil indicates a problem.
- What are common low oil symptoms? Common symptoms include the oil pressure warning light, unusual engine noises (like ticking or knocking), or a burning oil smell.
Maintain Your Engine: The Value of Regular Oil Checks
Regularly checking your engine oil is a simple yet vital maintenance task that contributes significantly to your vehicle’s health and longevity. By understanding how to check oil, interpreting the dipstick, and knowing when to add more, you can prevent potential engine damage and ensure your car runs smoothly. Make routine oil checks a consistent part of your car care regimen to protect your investment and enjoy reliable transportation.Engine oil is the lifeblood of your vehicle, lubricating moving parts, cooling the engine, and preventing wear. Understanding its condition and level is fundamental to maintaining your car’s health and longevity. Knowing how to check oil is a basic skill every car owner should master, as it can prevent costly repairs and ensure optimal performance. This guide will walk you through the essential steps for how to check car oil, covering everything from frequency to interpretation, empowering you to confidently monitor your engine’s vital fluid. We’ll detail the process for how to check engine oil accurately and what to do if adjustments are needed.
Why Regular Oil Checks Matter for Your Vehicle
Maintaining proper engine oil levels and condition is paramount for your vehicle’s operational integrity. Oil reduces friction between engine components, dissipates heat, and cleans internal parts by suspending contaminants. When oil levels are low, or the oil is degraded, its ability to perform these critical functions diminishes significantly. This can lead to increased friction, overheating, and accelerated wear on vital engine parts, potentially resulting in severe damage or even engine failure. Recognizing low engine oil signs, such as the oil pressure warning light on your dashboard, unusual engine noises, or a burning smell, is crucial. Ignoring these low oil symptoms can lead to expensive repairs. Regular checks help you identify these signs of low engine oil before they escalate into major problems.
When and How Often to Check Engine Oil
For most vehicles, a good rule of thumb is to check your engine oil at least once a month or before a long road trip. However, the ideal frequency for when to check engine oil can vary. Factors such as your vehicle’s age, mileage, and driving conditions play a role. Older cars or those with higher mileage might consume oil more quickly, necessitating more frequent checks. Similarly, frequent short trips, heavy towing, or driving in extreme temperatures can put more stress on the oil, requiring you to consider how often check car oil more regularly. Consult your vehicle’s owner’s manual for specific recommendations on how often to check oil. Establishing a consistent car oil check frequency is key to proactive maintenance. Generally, checking every few weeks is a safe practice for how often to check car oil.
Checking Oil: Hot or Cold Engine?
The question of checking oil hot or cold engine is common. For the most accurate reading, it’s generally recommended to check the oil when the engine is cold, or at least has been off for 10-15 minutes. This allows all the oil to drain back into the oil pan. If you check immediately after driving, some oil will still be circulating in the engine, leading to an artificially low reading. Therefore, for precise results, perform checking oil hot or cold with the engine cool. If you must check after driving, wait at least 15 minutes for the oil to settle. This practice ensures a reliable checking oil level cold vs hot assessment.
Step-by-Step: How to Check Car Oil Accurately
Performing an accurate oil check is a straightforward process. Follow these steps to check car oil to ensure you get a reliable reading.
- Park on Level Ground: Ensure your car is parked on a flat, level surface. This prevents inaccurate readings due to oil pooling on one side of the pan.
- Turn Off the Engine: If the engine has been running, turn it off and wait at least 10-15 minutes for the oil to drain back into the pan.
- Open the Hood: Locate and open your car’s hood.
- Locate the Dipstick: Proceed to the next step for guidance on this.
- Clean the Dipstick: Pull the dipstick out completely and wipe it clean with a rag or paper towel.
- Reinsert the Dipstick: Push the dipstick all the way back into its tube until it’s fully seated.
- Withdraw and Read: Pull the dipstick out again and observe the oil level.
These car oil check steps are essential for an accurate assessment of your engine’s oil. Following these engine oil level check steps will give you a clear picture of your oil status.
Locating the Engine Oil Dipstick
The engine oil dipstick is typically easy to find. It usually has a brightly colored handle (often yellow, orange, or white) and is located on one side of the engine block. If you’re unsure where is the dipstick, consult your car’s owner’s manual, which will provide a diagram. Knowing where is the oil dipstick is the first physical step in your oil check routine.
Reading the Oil Dipstick Correctly
Once you’ve pulled the dipstick out for the second time, observe the oil level. The dipstick will have two marks, often indicated by holes, notches, or the letters ‘L’ (Low) and ‘F’ (Full), or ‘Min’ and ‘Max’. The oil level should fall between these two marks. If the oil is below the ‘L’ or ‘Min’ mark, your engine oil is low and needs to be topped up. This is how to read oil dipstick markings effectively. The goal is for the oil to be near the ‘F’ or ‘Max’ mark, but not above it. This is what should oil level be for optimal engine health. An accurate engine oil dipstick reading is crucial for proper maintenance. Learning how to read car oil dipstick markings ensures you understand your engine’s needs.
Interpreting Oil Color and Consistency
Beyond the level, the oil’s appearance can tell you a lot about your engine’s health. New engine oil is typically amber or golden in color and transparent. As it circulates, it picks up contaminants and darkens, which is normal. Dark brown or black oil is usually fine, as long as it’s not sludgy. However, if the oil appears milky or foamy, it could indicate coolant contamination, possibly from a blown head gasket. A metallic sheen or visible particles suggest internal engine wear. Knowing what color should engine oil be when new helps you gauge its condition over time.
What to Do If Your Car Oil is Low
If you discover your car oil is low, it’s important to address it promptly. Driving with insufficient oil can cause significant engine damage. The immediate action is to add oil to bring the level back to the safe range. Do not ignore low oil symptoms or a low dipstick reading. Ignoring what to do if car oil is low can lead to serious mechanical issues.
Adding Engine Oil to Your Car
To add oil, first, ensure you have the correct type and viscosity recommended by your car manufacturer (found in your owner’s manual). Locate the oil filler cap on your engine, usually marked with an oil can symbol. Unscrew the cap, place a funnel into the opening, and slowly pour in about half a quart of oil. Wait a few minutes for the oil to settle, then recheck the dipstick. Repeat this process, adding small amounts and rechecking, until the oil level is between the ‘Min’ and ‘Max’ marks. Avoid overfilling, as too much oil can also cause engine problems. This is how to add engine oil safely and effectively. Proper adding oil to car engine technique prevents both under- and overfilling.
Frequently Asked Questions About Checking Engine Oil
- How often to check car oil? It’s recommended to check your car’s oil at least once a month or before long trips.
- Should I check oil hot or cold engine? For the most accurate reading, check the oil when the engine is cold or has been off for at least 10-15 minutes.
- What color should engine oil be? New oil is typically amber or golden. It will darken with use, which is normal, but milky or foamy oil indicates a problem.
- What are common low oil symptoms? Common symptoms include the oil pressure warning light, unusual engine noises (like ticking or knocking), or a burning oil smell.
Maintain Your Engine: The Value of Regular Oil Checks
Regularly checking your engine oil is a simple yet vital maintenance task that contributes significantly to your vehicle’s health and longevity. By understanding how to check oil, interpreting the dipstick, and knowing when to add more, you can prevent potential engine damage and ensure your car runs smoothly. Make routine oil checks a consistent part of your car care regimen to protect your investment and enjoy reliable transportation.